
On the first day, we assembled at the Hotel Management School for our first round of talks. Several of the lectures centered on history. Bill Andrews of Augusta University and Lorraine Daston of the Max Planck Institute demonstrated the importance of illustration through time. Illustrators have worked closely with scientists throughout history. The images they created not only founded our knowledge of anatomy and biology, but also had a great influence on the science that came after. Scientific images are always the product of four eyes; the scientist's and the artist's. As a result, every scientific or medical image leaves a trace of conflicts in differing epistemic virtues of the people involved. Esmee Winkel, from the Naturalis Biodiversity Center, then gave us some modern examples of this type of conflict in her work with botanists today.
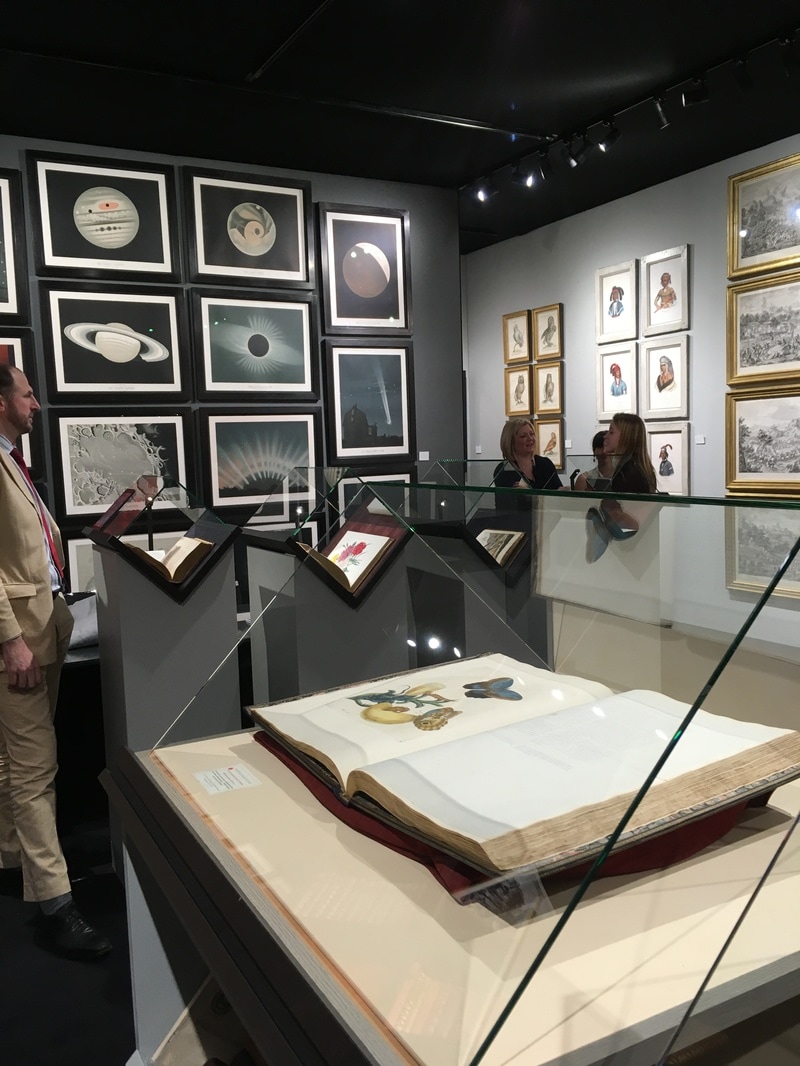
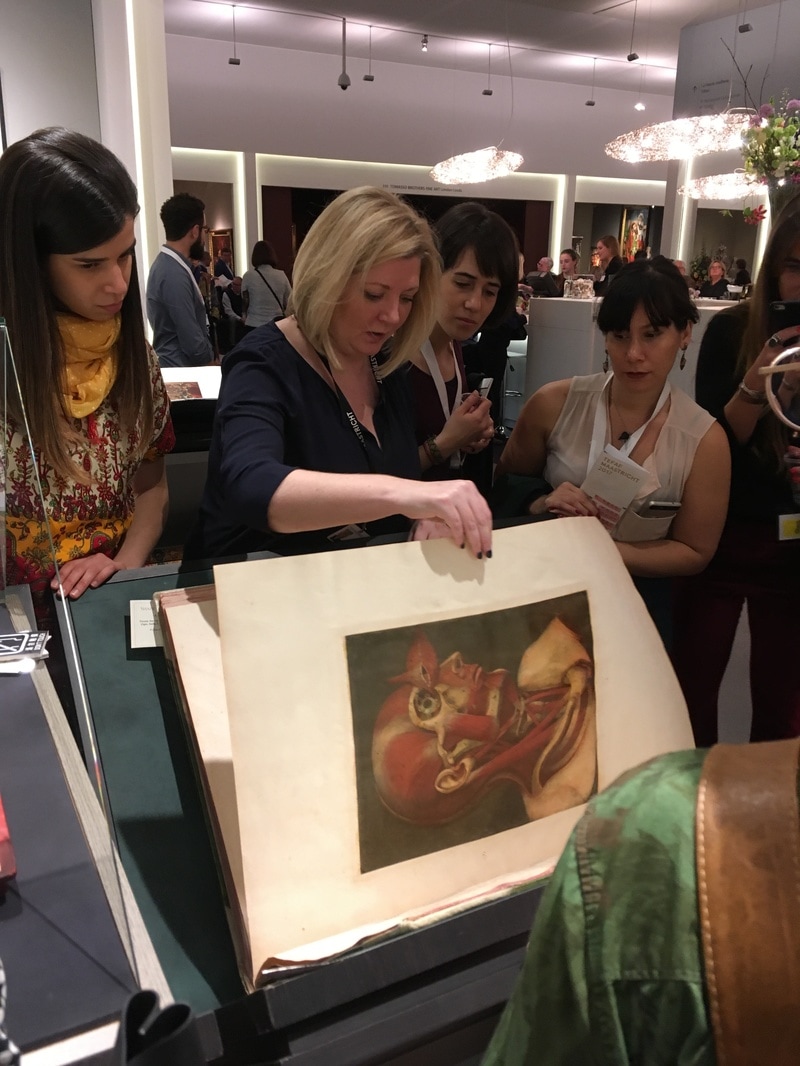
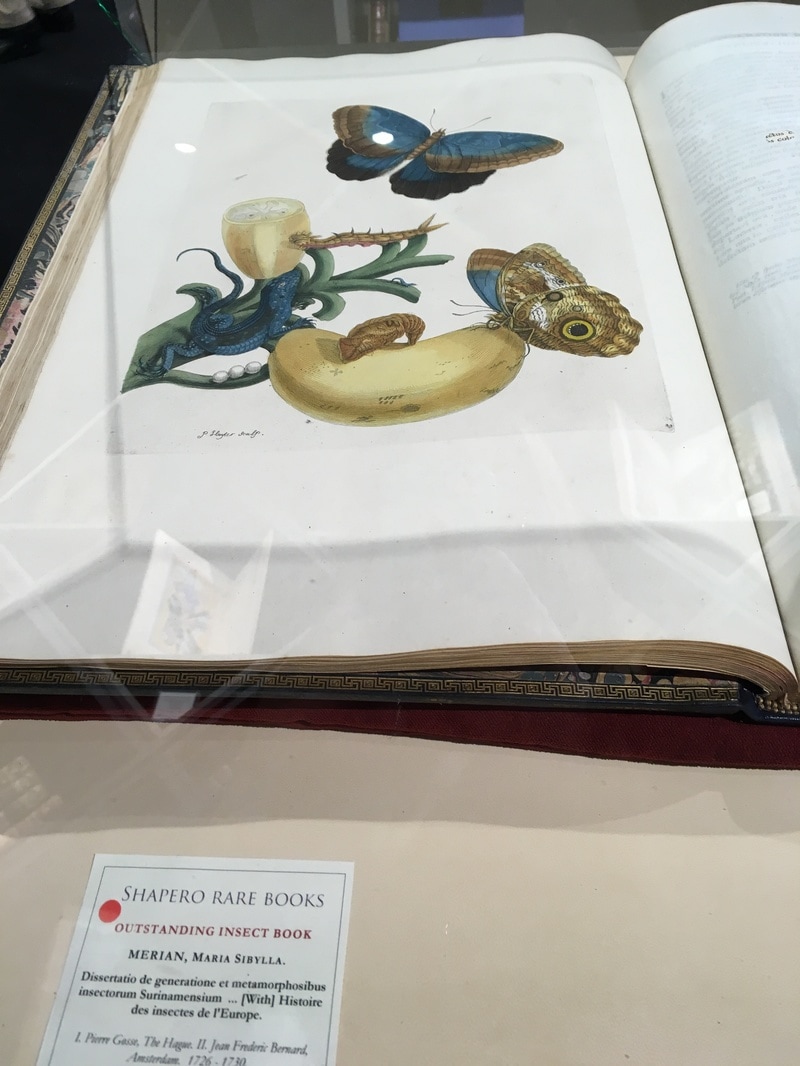
This year, the conference was held in Maastricht during the prestigious TEFAF art and antiques fair. After our talks, we had the opportunity to explore the giant TEFAF exhibition. We quickly narrowed in on historic science illustration. I thoroughly enjoyed seeing the rare books, illustrations by Maria Sibylla Merian, hand-painted lithographs of birds and mammals, and spectacular anatomical paintings by d'Agoty from the 1700s.
We heard about a number of exciting science illustration programs in Zurich, Dundee, France, and a fledgeling program starting this year in Spain. One of my favorite talks was by a new freelance illustrator, Jessica Koren. Jessica is a medical illustrator and presented us with a beautifully honest talk about sticking her neck out, piloting her business, and overcoming fears in order to grow. I think we all responded to her talk because we all share these fears, doubts, and challenges when finding clients and valuing our work. One of my favorite tidbits from this talk was her method of keeping a Captain's Log for her projects, writing down all that happened, went wrong, and how to fix it next time.
We also heard from Pancras Dijk who gave us a window into the history and editorial process at National Geographic. While most people immediately think of stunning photography when they think about National Geographic, the magazine relies heavily on information graphics to tell stories, bring the past to life, and visually communicate complex concepts. Pancras presented a very clear argument for why illustrations are so important and how they accomplish communication in a way that photographs often cannot. Our final talk came from Erik von Ommen, a bird painter, who showed us beautiful videos about his process. His talk was very inspirational as he explored many techniques including etching, wood cuts, watercolor, sumi-e ink, oil, and even gold-leaf. His advice is to take risks, show who you are, and don't be afraid to think outside the box.
0 Comments
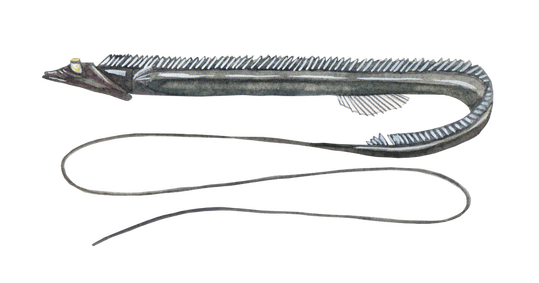
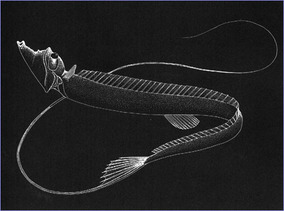
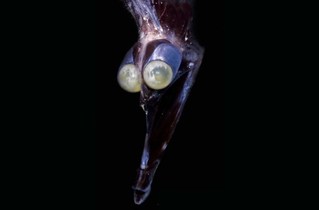
"You have to finish a fish? Did I hear that right?" my friend asked when I told her why I was running late. Yep, I have been painting fish every day since I moved to Switzerland. This latest batch of fish will accompany a new research paper on fish evolution, and this project follows a previous research paper by the same group that had me painting around 65 different fish species. The greatest part about working with the Alfaro lab at UCLA is that my painting assignments include some of the world's weirdest, rarest, and most beautiful ocean fish. That also means it can be a bit challenging to figure out how to accurately represent fish that have rarely been photographed. Each species requires a lot of research in order to make sure the illustrations depict accurate morphology and coloration. I start with Fish Base online, a website that includes descriptions, illustrations, and photos of fish species from around the world. Many of the photographs are of dead fish, which works well for understanding the anatomy, but results in dull or false coloration and often damaged fins. Further online research helps provide live photos of the fish in most cases. One of the most challenging fish to paint was the tube-eye fish, Stylephorus chordatus. This species is a deep sea fish that looks like something out of an alien movie. It is rarely seen and there are very few photographs. My illustration had to be based off of the very limited number of illustrations and photographs I could find. I did not have a clear sense of what the coloration should be, but some of the deep sea researchers I asked described it as silvery-black.
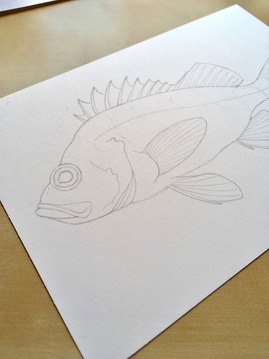
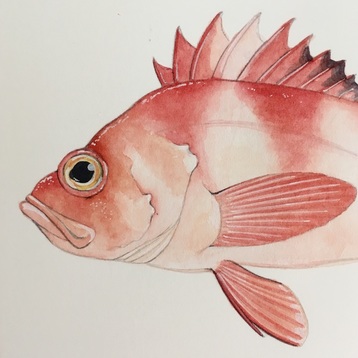
 Most of the fish species are much more straightforward. For example, there are endless photos online of pink salmon (Oncorhynchus gorbuscha), and I have the advantage of having caught salmon recreationally for most of my life. I had a pretty good idea of what it should look like. 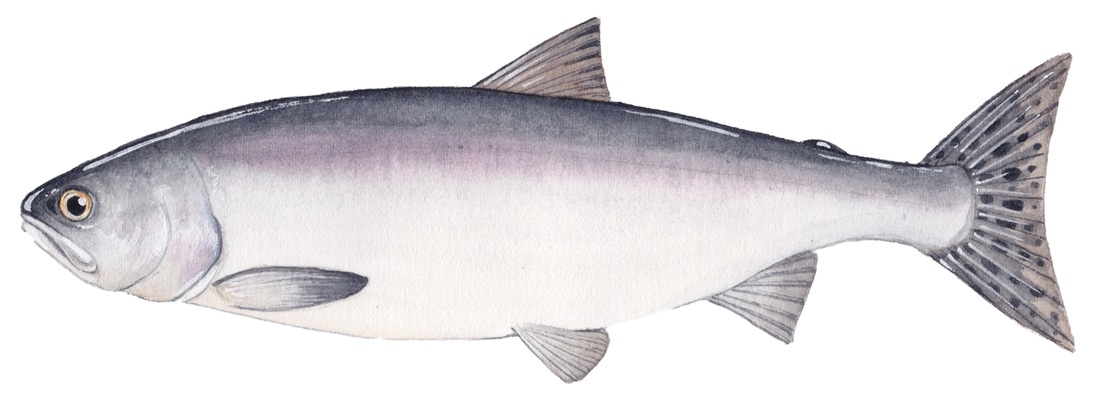 For all of the fish paintings, I always start with a number of reference photos to create the most accurate sketch of the animal. After sketching on the computer, I then print out the sketch and refine it on paper before transferring it to watercolor paper using carbon paper. I can then use layers of watercolor followed by white gel pen to create the coloration, texture, and highlights.
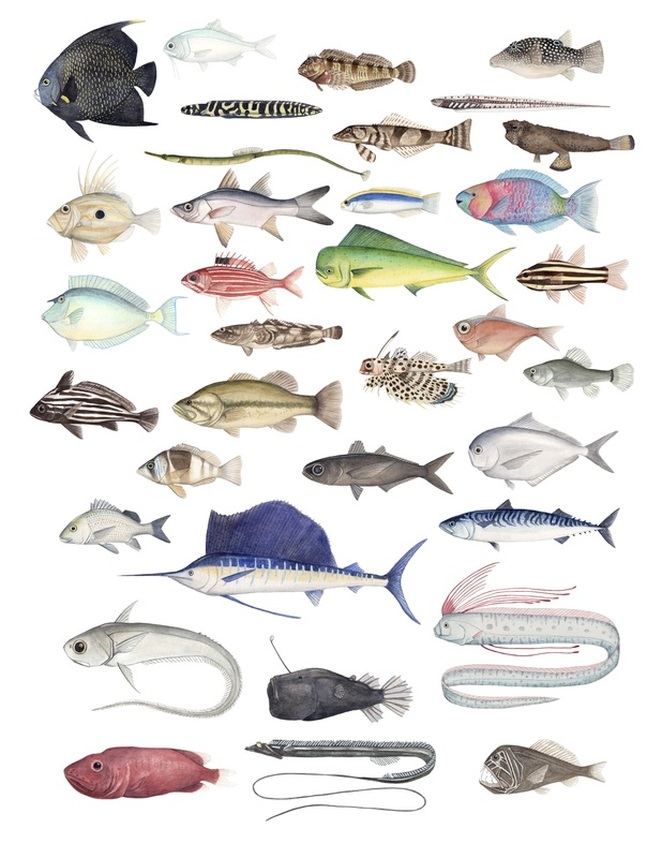 Here is only a small sampling of the 80+ fish that I have painted so far. Stay tuned for links to the research publications once they come out. They are sure to make a big splash!
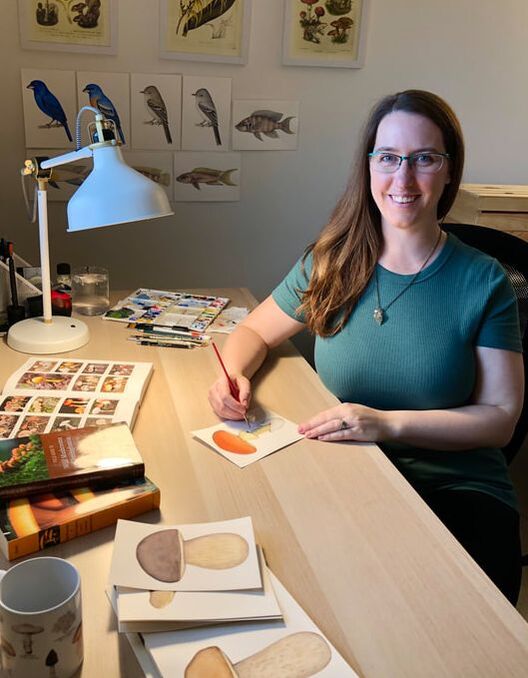
I don't often receive requests for logo design, but I really enjoy the challenge of creating a single image to explain the ideas and goals of a project. Biologists at Princeton recently asked me to design a logo to represent their research on North American canine genomics and evolution. This collaborative project incorporates researchers from multiple institutions in order to explore the genetics of canine populations across North America. For this logo, I worked with the project's Primary Investigator, Bridgett vonHoldt, to better understand what the image would need to convey. I then presented the group with a number of roughly sketched designs. 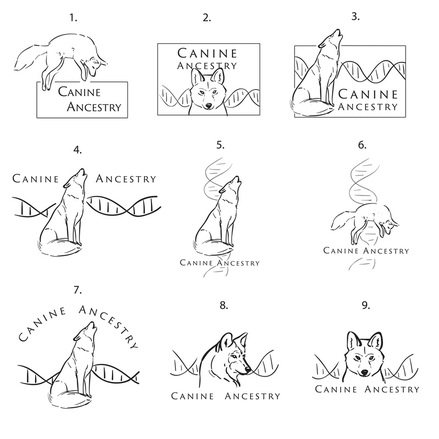 Design number 3 was the group's favorite, but it needed to also include the words "North American". I then used Adobe Illustrator to complete the final illustration, choosing a black and blue color scheme to match the project's website. Learn more about the Canine Ancestry research group at http://canineancestry.princeton.edu/home.html. You can also follow the project Twitter feed @k9ancestry for the latest news.   I am excited to announce that I have taken the plunge and become a full time freelance illustrator from my new home in Zurich, Switzerland. Earlier this month, my husband and I moved to Zurich, beginning our new adventure as expats in Europe. This move is a great opportunity to expand my business and pour more time and effort into art and illustration. Move to Switzerland in November!? Who would be that crazy? I thought this would be a terrible time to move. Cold, snowy, dark, rainy. The start of winter would surely make me miss California too much. It turns out, however, that I moved here during peak mushroom season and at the start of the festive Christmas markets. The city is sparkling with lights and the forest is loaded with fungi! Bundled in enough layers, this Californian can enjoy it all without freezing. Before leaving the states, I decided to make my business an LLC, mainly for legal protection and to build it as its own entity, separate from myself as an individual. This was easier to do than I thought it would be. Naming the business was probably the hardest part. I changed my name from Himes to Johnson, and it turns out there are a lot of Johnsons out there. Finding a business name using my new name was tough. I spent a lot of time thinking about the name, coming up with many duds, and asking friends for suggestions. Having worked as a biologist and lab manager in Life Science departments throughout school and career, I decided this was a fitting title and encompassed the type of work that I do. I was able to then register the business as an LLC by simply filling out the forms online, and then I changed the URL of my website. Next task: new business cards. As I start on this new chapter, I am aiming to build Life Science Studios, LLC into something meaningful, artistic, and valuable for biologists and their audiences. I believe illustration can be an important tool for communicating science, and I hope to do that from my new art studio in beautiful Switzerland. Be prepared for more frequent blog posts, lots of mushroom paintings, and pictures of Alps thrown in every once in awhile!
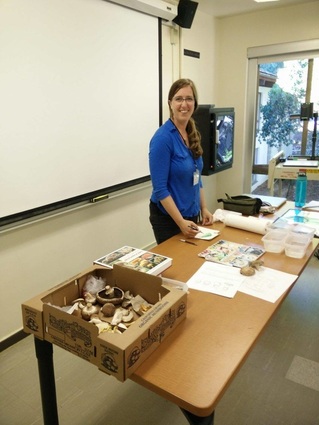
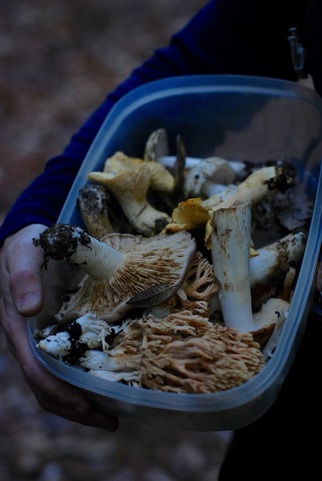
I am excited to announce my partnership with the very talented ladies at B&K Crafts. Natalia and Madhu are local artists and jewelry makers who love to incorporate Bay Area nature into their unique wood pendants and earrings. Please check out their online store on Storenvy to see their beautiful creations, and if you browse through the selection, you just might see a couple of my own paintings now in a wearable form! 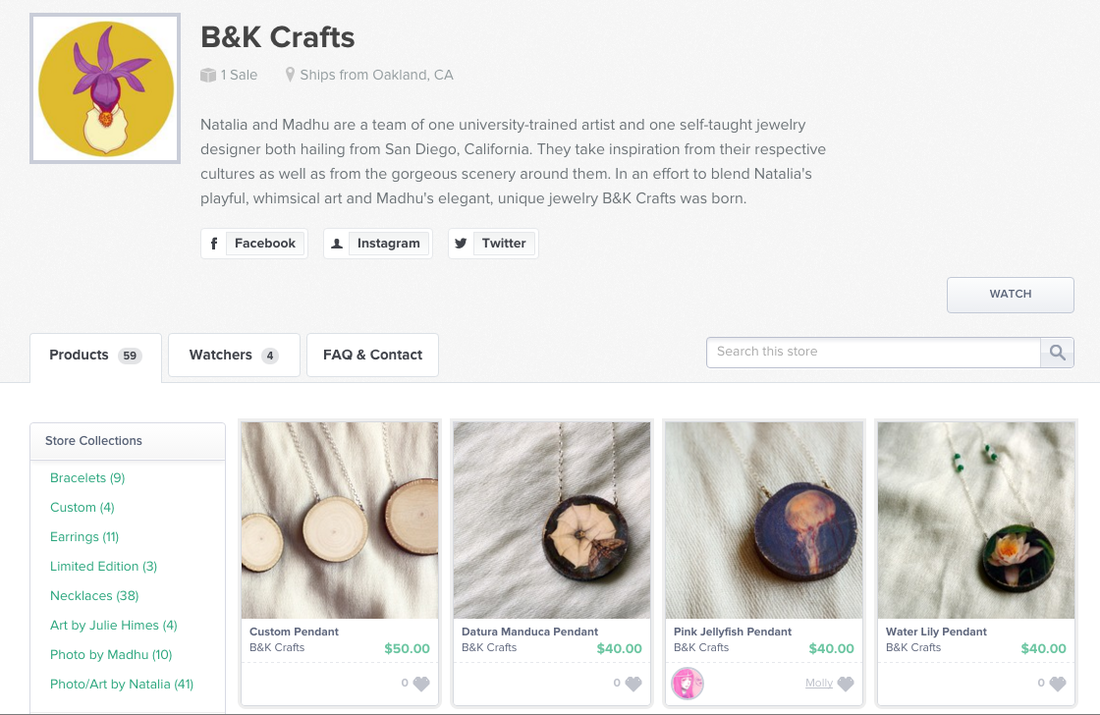 By mid-November, the first soaking rains fall in California and the temperature begins to drop. Members of the Mycological Society of San Francisco (MSSF) watch the weather forecast closely, hoping for a downpour so that mushrooms will blanket the forest floor during their annual trip to Mendocino Woodlands Camp. These mushroom hunters are scientists, hikers, chefs, and artists, brought together by a love for fungi. They are all there to enjoy the woodlands, to eat prized mushrooms, and to nerd out over beautiful, unusual, and delicious fungi. Every year, new people join the MSSF, and I was one of those new people last year. 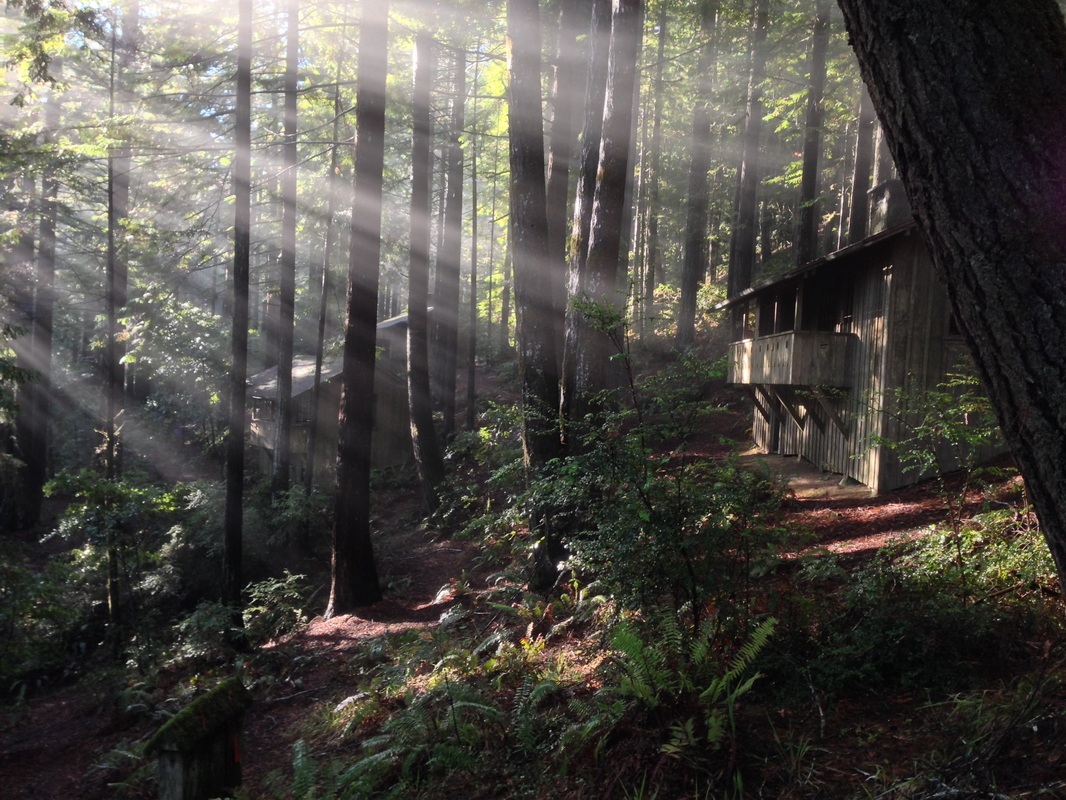 Mendocino Woodlands Camp was built in the 1930’s and is a National Historic Landmark (photo: Julie Himes) In 2013, a mycophile friend of mine suggested I paint a series of watercolor mushrooms for the MSSF’s annual Fungus Fair. To prepare, I started going on forays with him to learn about fungi and painted some of my favorite species. I set up a booth at the fair in San Francisco that December to see if I could sell a few prints and cards of my paintings. I received a warm welcome from Curt Haney, the president of the club, and he asked if I would paint a poster design for the next year’s fair. In exchange, I would get a free ticket to mushroom camp. Mushroom camp? You mean, drive six hours up the coast to camp in the woods with a bunch of mushroomy strangers? I said yes, and also asked my mycophile friends if they wanted to come along. The experience was incredible. It felt like we had walked into a mushroom wonderland! We left camp that winter with a car full of chanterelles, candy caps, and boletes, and our calendars marked for next year’s camp. Excited for my second trip to mushroom camp, I leave my office in Monterey this past November and drive up the coast through San Jose and San Francisco. The drive is a spectacular gradient from busy bustling city to peaceful quiet forest. I arrive just in time to eat the night’s meal; lasagna with king trumpet and maitake mushrooms, and chocolate brownie with candy cap creme (mushroom enthusiasts know how to cook!). I meet up with my friends and we haul gear up to the cabin. Our cabin is rustic with a sense of history. Built in the 1930’s, the cabin is made of redwood from the surrounding land and a has a sturdy stone fireplace. We sleep on cots around the fire, four in our cabin. The following morning, we gather for breakfast (biscuits with porcini gravy of course) and split up into smaller groups to hike and forage the surrounding area.  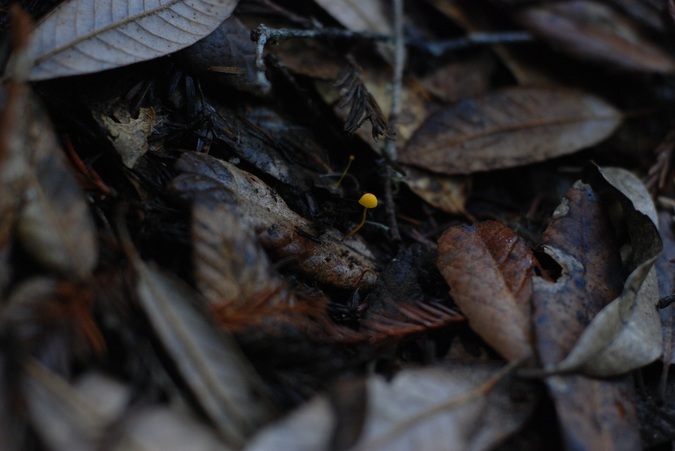 Tiny mushrooms and cup fungi nestled in the leaf litter (photo: Julie Himes) Mendocino is known for its mushroom diversity. During a good year, hundreds of species can be found in Mendocino Woodlands State Park. Last November, the MSSF campers found over 300 species in a single day. This year is not a “good” year. With the ongoing drought, we haven’t seen enough rain to bring out the mushrooms. While last year was filled with diversity and lots of edible mushrooms, this year is characterized by a many very tiny species.
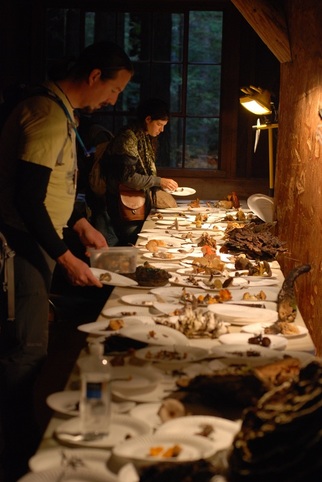
We take the mushrooms we find to the display tables for identification (photos: Julie Himes) We hike most of the day, collecting anything new we find, always keeping our eyes open for a tasty chanterelle or prized porcini. After the forays, the campers gather at the Dance Hall to turn our haul over to the experts who identify each mushroom and display them on labeled paper plates. Seeing all of the species side by side is striking. There is so much diversity of form, color, and size. That night is spent eating wild mushrooms around the campfire, chatting about our best mushroom hunting days, and attending a talk by mushroom expert, Gary Lincoff. As we collapse in bed, the rain begins to pour outside, and we all dream about the mushrooms that have been waiting underground for the rain. 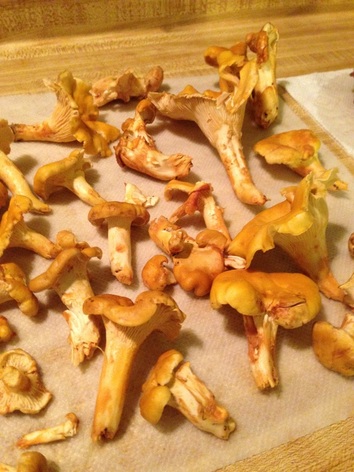 Chanterelles are among the edibles found in Mendocino. (photo: Julie Himes) This Sunday, December 6th, the MSSF will host its 67th Fungus Fair at the San Francisco County Fair Building in beautiful Golden Gate Park. My fellow mushroom hunters will spend all day tomorrow foraging in the Bay Area to bring examples of our local diversity to the display tables. I too will be there with my watercolor paintings and to share in the excitement for this winter’s mushroom season.
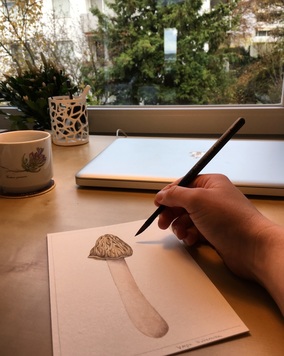
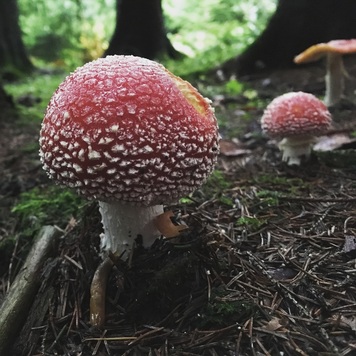
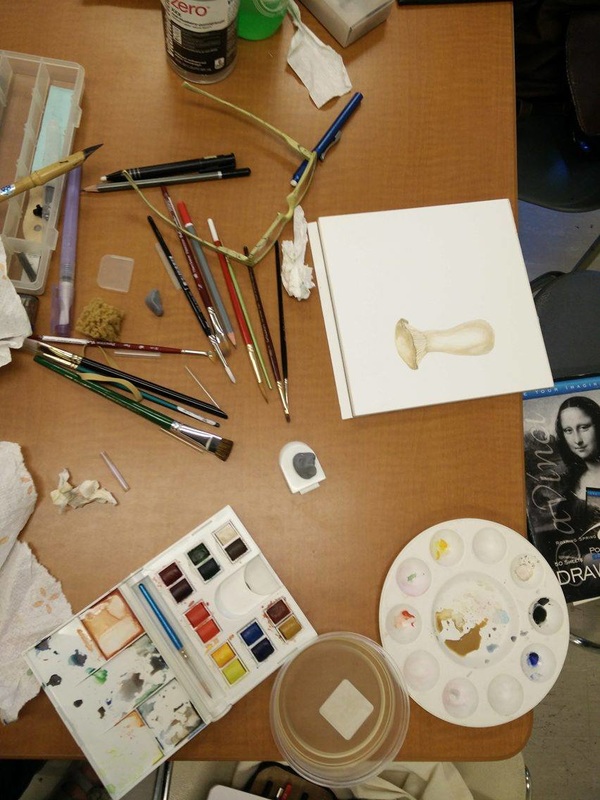
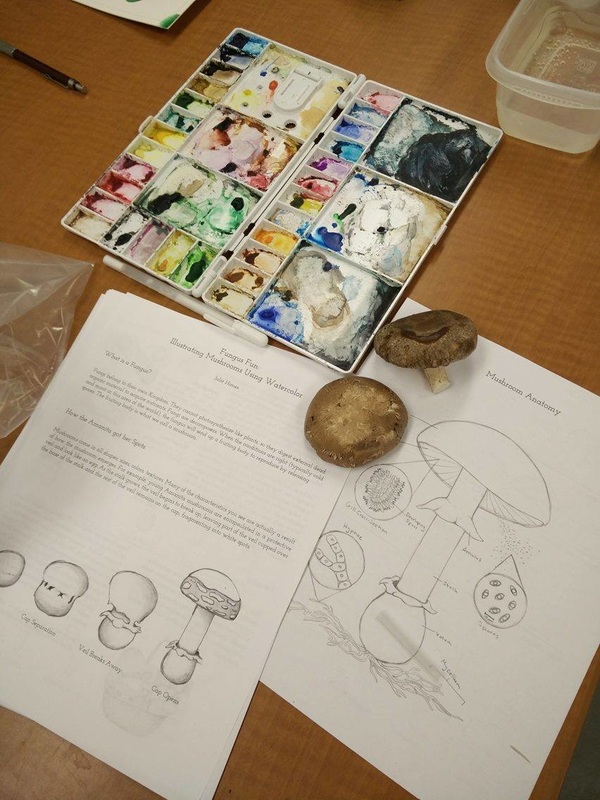
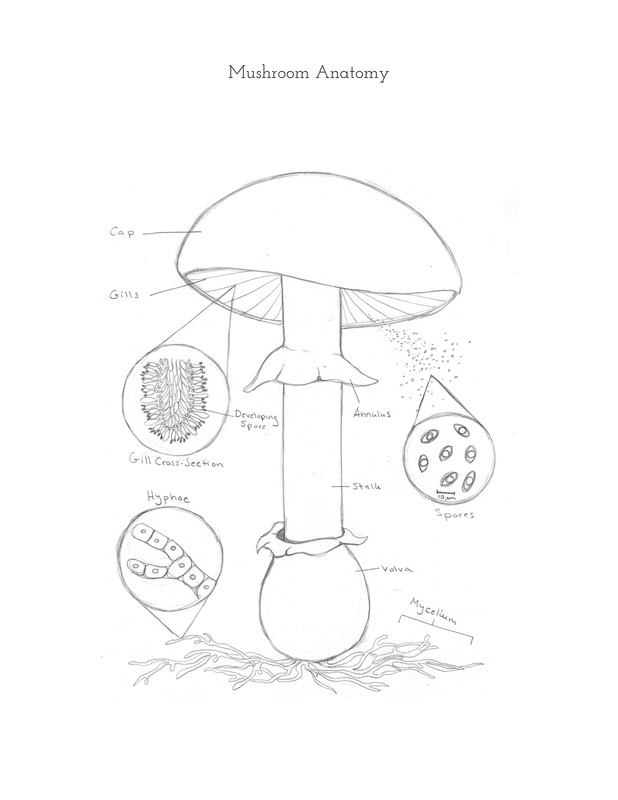
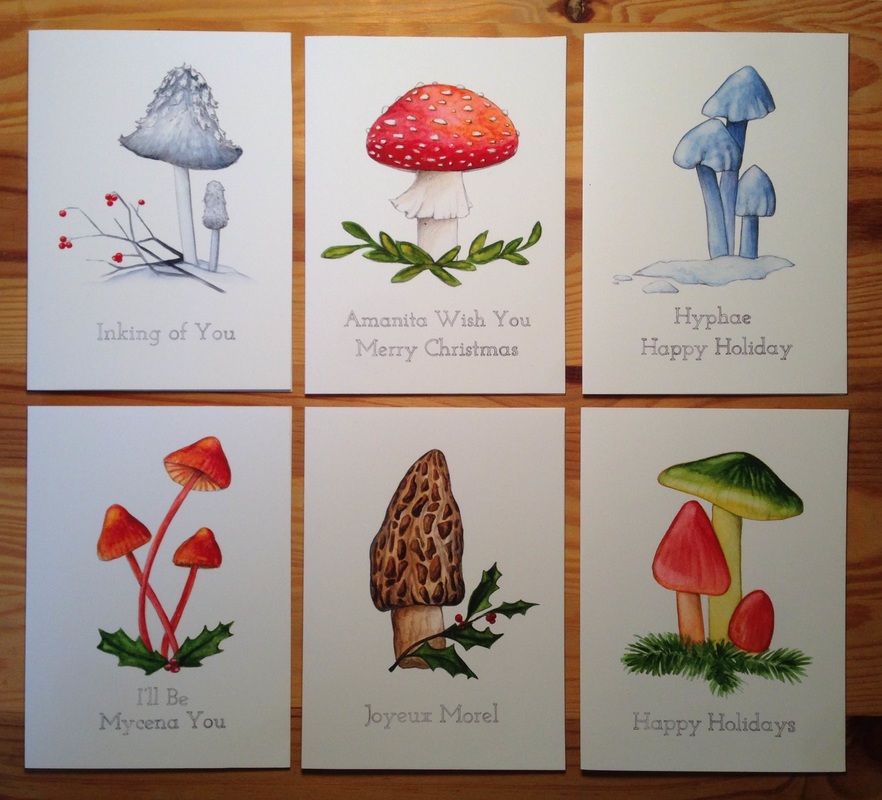
It's fall and I am painting mushrooms non-stop! Tonight, I thought I would take some step by step progress photos and show how I go about painting a mushroom. Step 1: Find a mushroom. (Or if you live in California... and it hasn't rained enough yet... look some up in guide books and online). 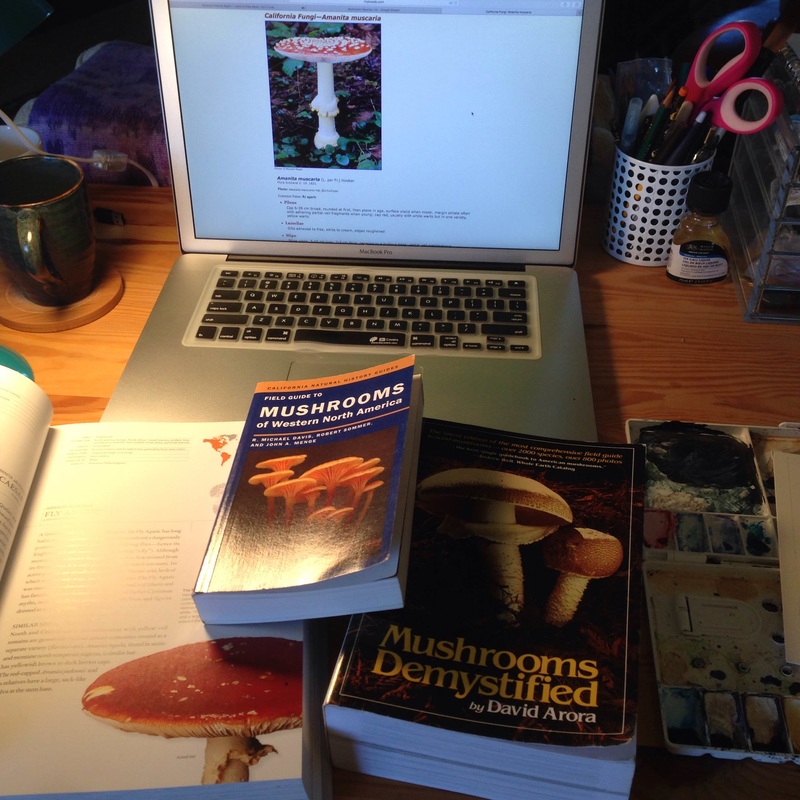 Highly recommend David Arora's "Mushrooms Demystified" for anybody who wants to know everything about fungi while also working on their biceps. Step 2: Sketch! I like to do sketches in a very light pencil (3H) directly on watercolor paper. Keeping it light helps when I make the inevitable mistake and have to erase. I think I erased this mushroom four times before getting the cap shape right. For mushrooms, it's important to pay close attention to the shape of the cap (is it rounded? bell-shaped? is there a dent in the middle?), the texture of the stalk (is it smooth? fuzzy?), and other structures such as the volva (that's "volva", not "vulva") and annulus (also not what it sounds like). I have picked the Fly Amanita (Amanita mascaria). This species has a rounded cap covered in white warts, a skirt-like annulus, a smooth stalk, and a bulbous base. 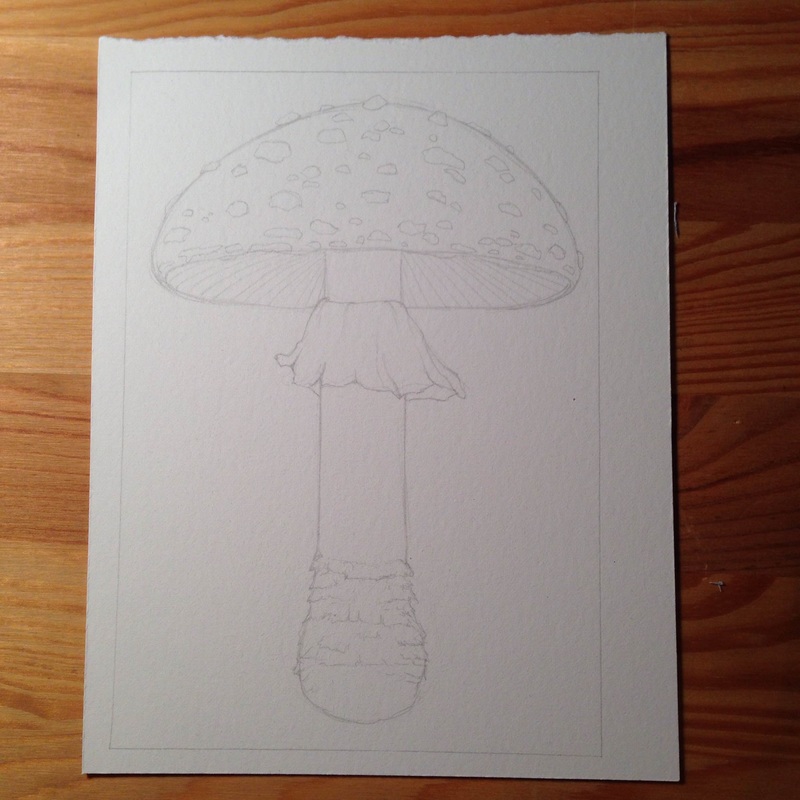 Step 3: Block in some of the colors. For this species, I know that the top of the cap shades to a red-yellow, so I put down a layer of yellow that will get covered up with red paint later. I always test colors and color combinations on a sheet of paper before using them on the real painting so that I know how they will turn out. At this point it looks super ugly. It is very difficult to get past this point and realize that it will look better later, but you just have to keep working on it until it improves. Don't give up! 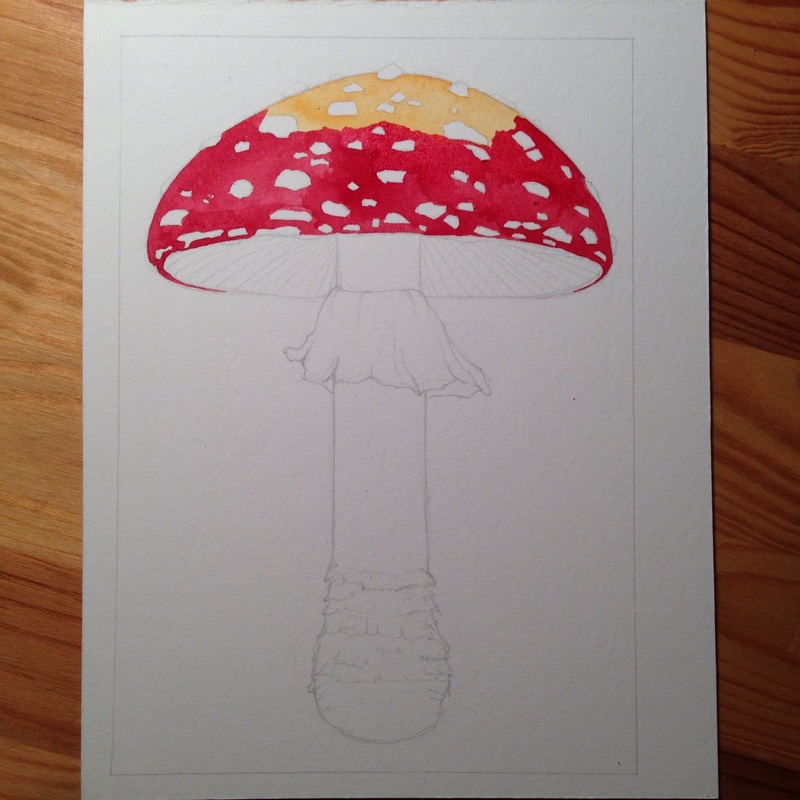 Step 4: See? It looks a little better after filling in the rest of the cap. 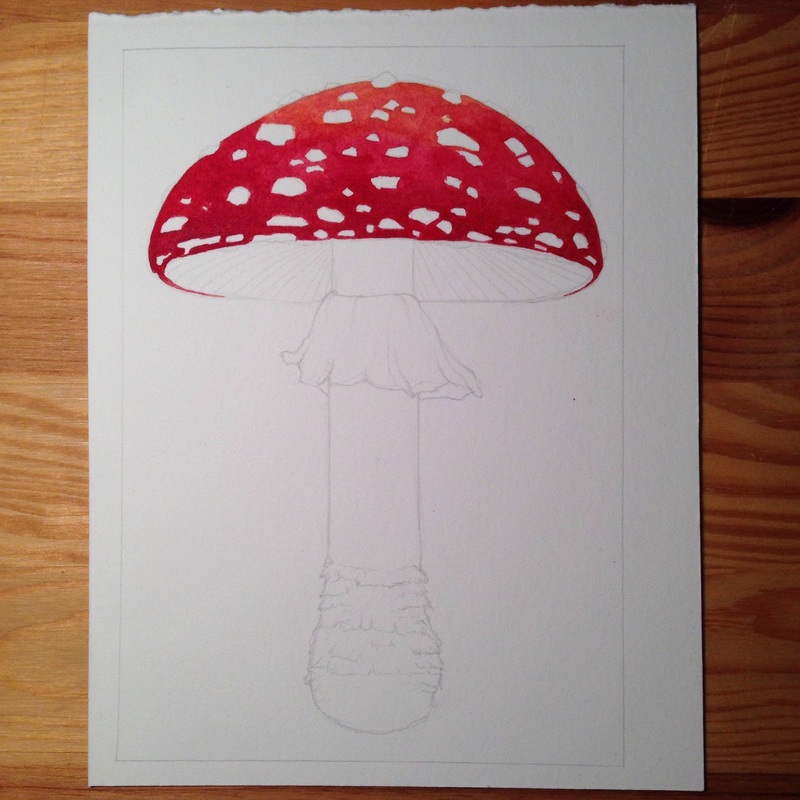 Step 5: Shading. I use an even mix of ultramarine blue and burnt umber to make a gray shadow color. Shading the white parts of the mushroom involves a teeny amount of paint applied in the shadow areas and then blended using water to make it look more subtle. 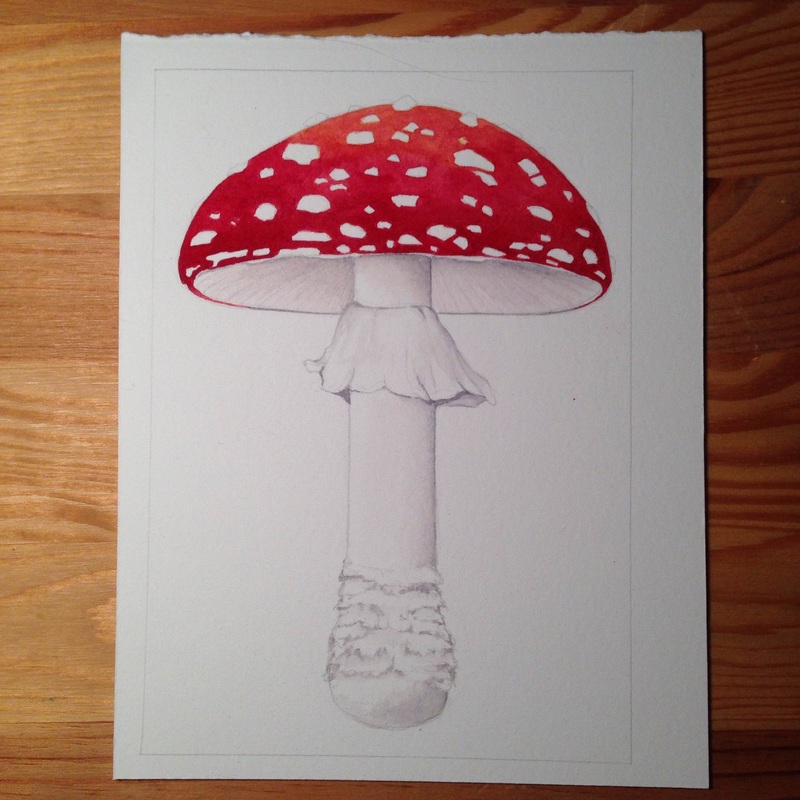 Step 6: Darken the darks. I picked a dark green to add to the red for shading around the cap. I also stuck some dark gray under the cap and around the base of the stalk. Aaaaaand it's done! 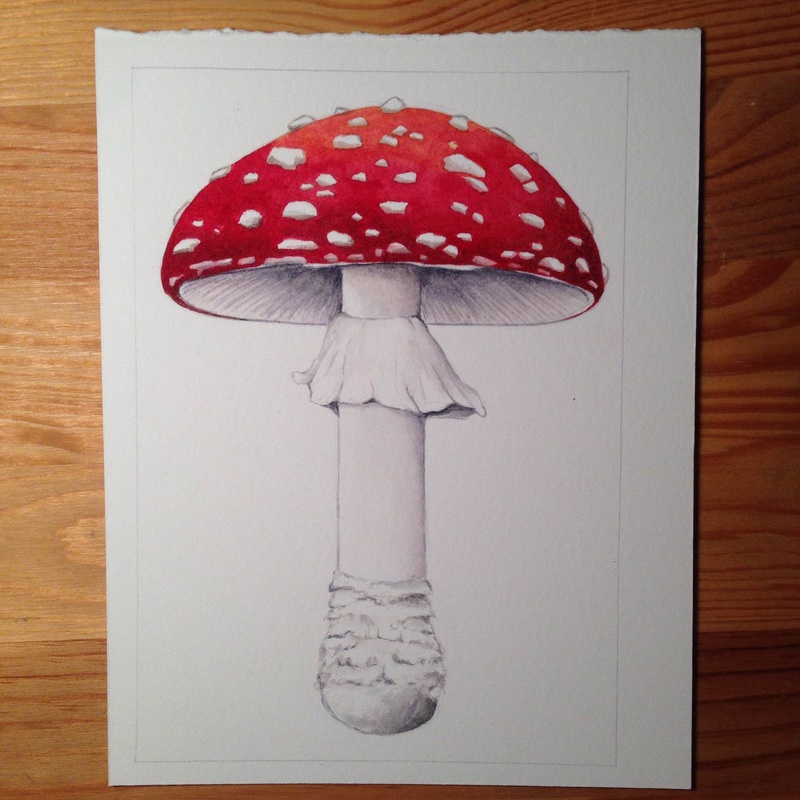 Everything is happening this fall, my favorite time of the year! The mushrooms are coming out and I'm busy painting them. This fall, I have artwork on display in two art exhibits, and I will have a booth up in a holiday art fair and the fungus fair. I hope you can make it out to these events to check out the beautiful work from local artists and learn a couple of things about fungi.
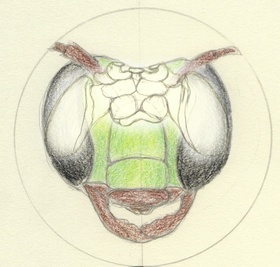
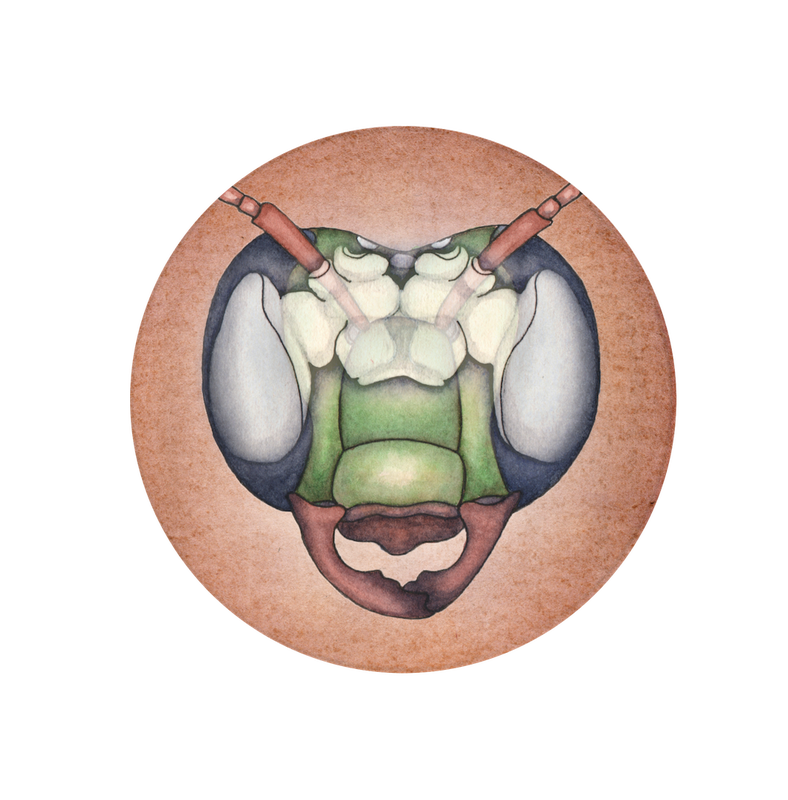
I recently had the opportunity to collaborate on another paper about the evolution of eusociality in bees, this time with Beryl Jones, a Ph.D. candidate at the University of Illinois at Urbana-Champaign. Jones uses comparative genomics to understand the mechanisms behind social evolution. Eusocial insects exhibit a division of labor among individuals in a colony (queen, workers, soldiers, etc.). Jones' paper in G3: Genes, Genomes, Genetics looks at the developmental transcriptome of a facultatively eusocial bee, Megalopta genalis. This species is a useful study system because it exhibits and range of solitary and eusocial behaviors, whereas many bee species are exclusively solitary or social. By investigating this species, Jones aims to learn more about the underlying genes involved in eusociality. As an illustrator, my task was to depict a developing bee and also show the tissues where different genes are expressed. For each illustration, I created paintings separately and then compiled them using Adobe Photoshop. For example, the nest was a stand-alone illustration upon which I layered the life stages. One of the most interesting parts of this project for me was painting the bee brain. I previously did not know what a bee's brain looks like, and it was fascinating to see how much of the brain is involved in the bee's sensory organs such as eyes and antennae. 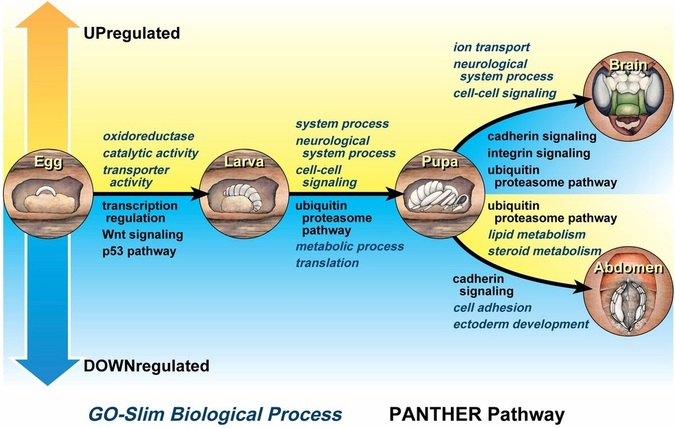 Figure 3. Functional annotation of genes showing differences in expression associated with pairwise transitions between life stages. Terms above transition arrows indicate genes that are more highly expressed in the life stage to the right of the arrow, while terms below the arrow indicate genes that are more highly expressed in the life stage to the left of the transition arrow. Terms in black are PANTHER Pathways, while blue italicized terms are GO-Slim Biological Processes. All terms listed are statistically overrepresented with a Bonferroni-corrected P<0.05. Artistic renderings of different life stages and tissue types are not representative of every sample included in the analysis, and only represent one particular life stage, sex, or tissue. Drawings by Julie Himes. Here you can see progress shots from very rough sketches into final paintings. The rough sketches give me a sense for composition and allow me to make sure I have the anatomy and proportions correct before transferring the sketches to watercolor paper and adding pen and watercolor to create the final illustration.
|
Categories
All
|


 RSS Feed
Proudly powered by Weebly